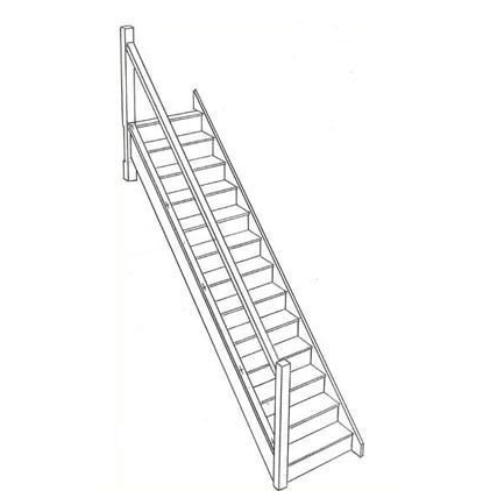
Install Our Staircases
How to install your new staircase
Whilst Pear Stairs highly recommend that a qualified joiner fits your staircase, skilled DIY enthusiasts may attempt the task themselves. This is a guideline to fitting the staircase:
 |
Basic Procedure To Fit Your Staircase.
|
1. |
Check critical dimensions before proceeding: |
|
a) Check the well size is as per plan. |
|
|
2. |
In most cases, fit your staircase from top to bottom (dependant on access). |
|
3. |
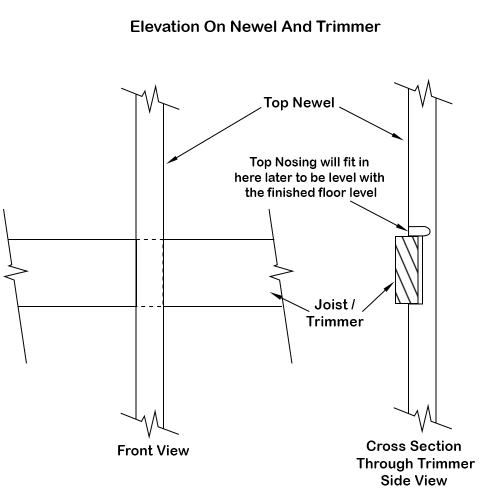
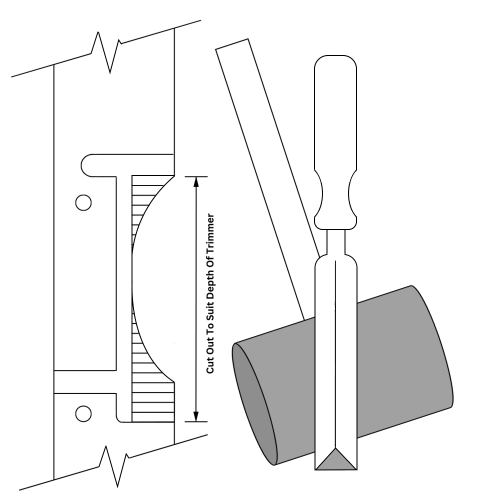
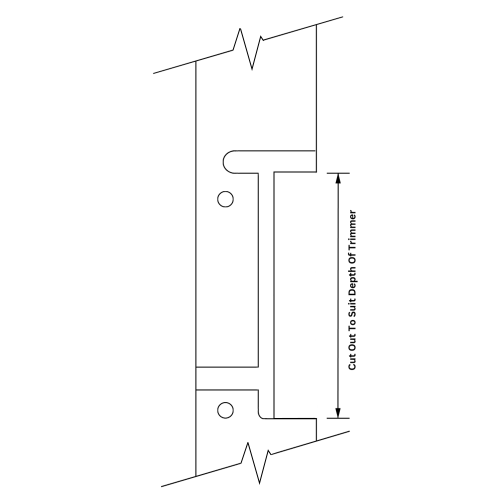
Cut the top newel to fit onto the trimmer. |
|
Firstly cut out top newel to fit onto trimmer. Do not fix newel at this stage. |
|
|
NOTE: Trimmer, is a trimmer joist, which is a crosspiece fixed between full-length joists to form the staircase opening. |
|
 |
|
|
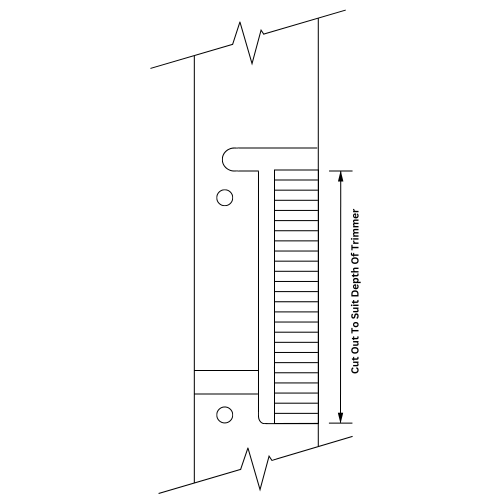
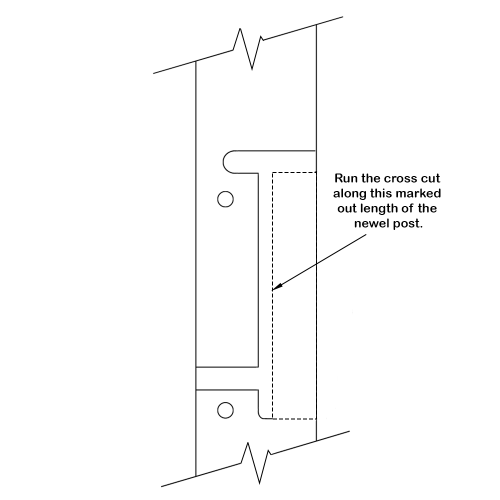
Put riser temporarily into position. Scribe line the thickness of riser to determine the depth of the sawcut. |
|
 |
|
|
After marking your line, allowing for the thickness of riser, make saw cuts with a cross cut saw for easy removal with mallet and chisel. |
|
 |
|
|
Using a mallet and a chisel, remove slithers of cut wood to leave a recess to fit onto trimmer. |
|
 |
|
|
Your top newel should now look like this. |
|
 |
|
| NOTE: A quicker way to cut this timber out is to use a cordless 6" circular saw as pictured below: | |
 |
|
 |
|
4. |
Cut the bottom newel to the correct length. |
|
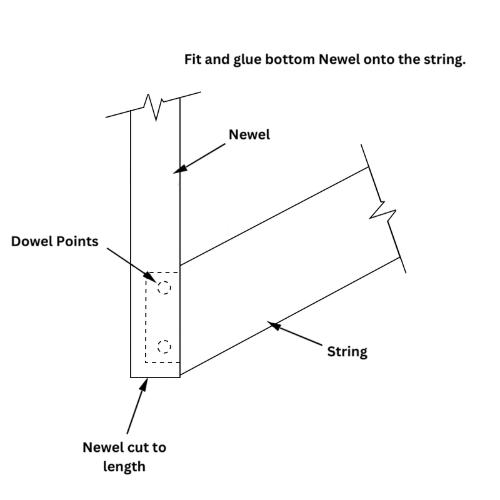
Cut bottom newel to correct length. If the floor is not level it is possible that the newel may differ in length. Newels are always delivered extra long to allow for this. |
|
|
Fit and glue bottom newel onto the string. The dowel holes are drilled slightly off centre to pull the newel and string tightly together. (Make sure the wood grain of the dowel is in line with the wood grain of the newel). Taper the dowel slightly for easy insertion. (you will find that all our dowels are pre-tapered) Once the piece is pulled up tight, cut off the excess dowel and sand. |
|
 |
|
|
5. |
Fit bottom riser. |
|
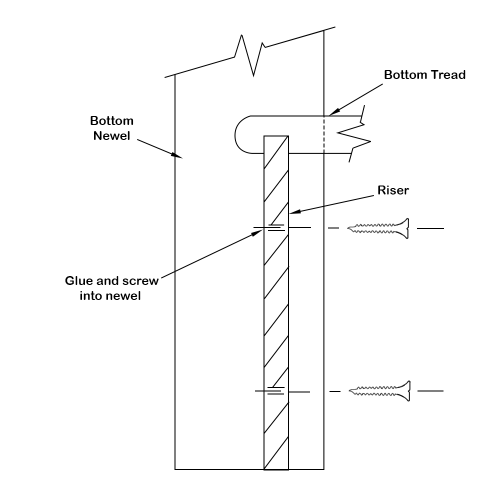
With the bottom newel fitted slot the riser into position and mark bottom riser in line with bottom of newels. Take riser out and cut to correct length. |
|
|
|
|
|
You can now fit the bottom riser into position but make sure the newel post is square (at 90°) with the tread and newel post is plumb (vertical). Fix the bottom riser to the string side first. |
|
 |
|
|
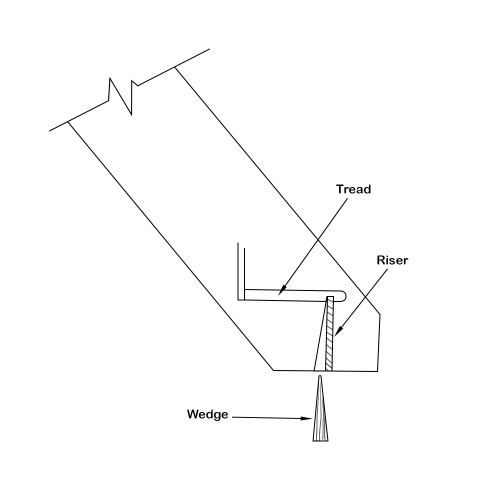
Now screw and glue the bottom riser into the newel on the newel side. On the string side, the riser needs to be kept in place with a wedge and glue as shown below. Please ensure that plenty of glue is applied to both edges and inside face of the wedge. Tap wedge firmly into place. Remove excess glue with a chisel. |
|
 |
|
|
6. |
Fit the glue blocks. |
|
|
|
|
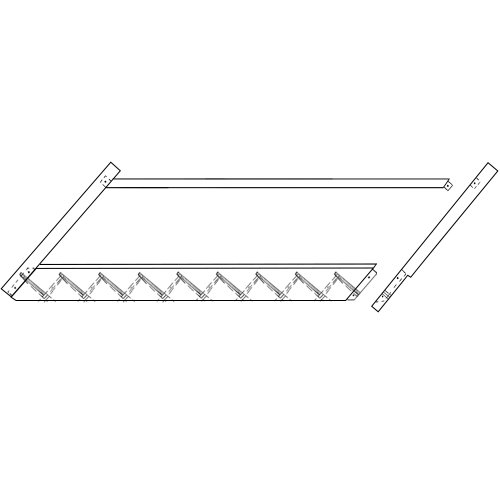
View looking underneath the staircase, showing glue blocks. The majority of these blocks will already be glued on your staircase. Once the bottom rise is fitted the blocks will need to be fitted. We recommend about 3 or 4 blocks per tread. Use plenty of glue, and when positioning the blocks, move back and forth to remove all the air. |
|
|
7. |
Baserail: We recommend placing your baserail on the string and cutting it to length before you fit the top/second newel. |
 |
|
|
8. |
Fit the top/second newel to the string, making sure you fit the handrail at the same time. |
|
There are two ways to fit the top newel and handrail. First method: Lie your staircase on its side if you have the space so you can fit the newel posts, handrails and baserails. |
|
 |
|
|
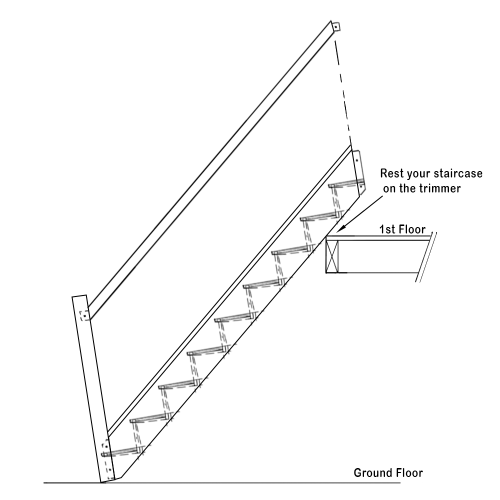
Fit the top newel using glue and dowels (see below second method). Second method: If you haven't already got the space, rest your staircase on the trimmer on the first floor. The handrail must be fitted at the same time as your top post. You will need someone at the bottom of the stairs to hold everything in place. |
|
|
|
|
|
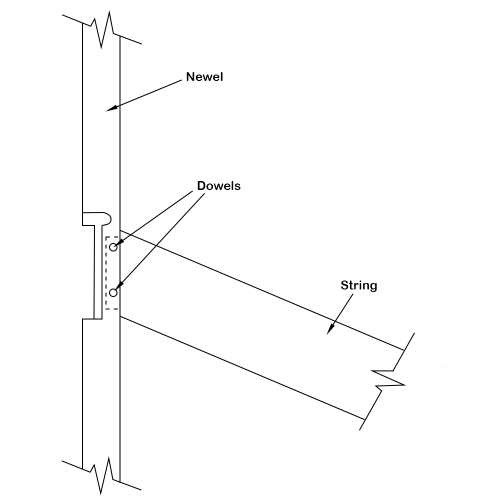
Glue and dowel top newel onto strings. (Make sure the wood grain of the dowel is in-line with the wood grain of the newel) Taper dowels slightly for ease of entrance. (You will find that all our dowels are pre-tapered). Tap snugly into place with a mallet. Cut off excess dowel and sand back. Use plenty of glue. |
|
 |
|
|
9. |
Fit the handrail at the same time as fitting the top newel to the string. |
|
Fit the handrail using the glue and dowels. (See below) |
|
 |
|
|
Glue and dowel the rake handrail. (Make sure the wood grain of the dowel is in line with the wood grain of the newel). The dowel holes are drilled slightly offset to ensure the joints are pulled tightly together. Taper dowel slightly for ease of entrance. Tap dowel snugly into place with a mallet. Cut off excess dowel and sand back. Use plenty of glue. |
|
|
10. |
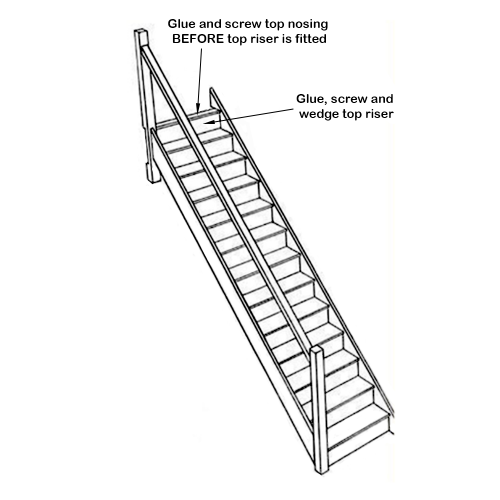
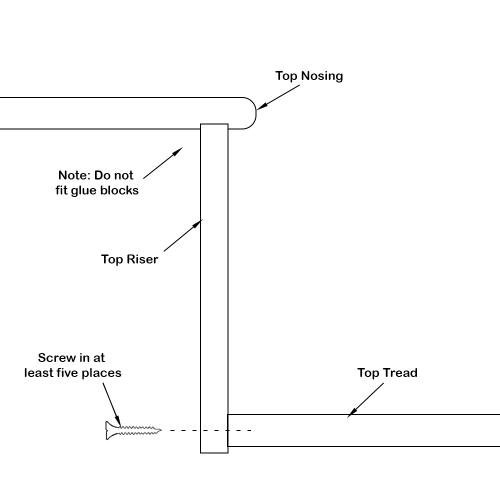
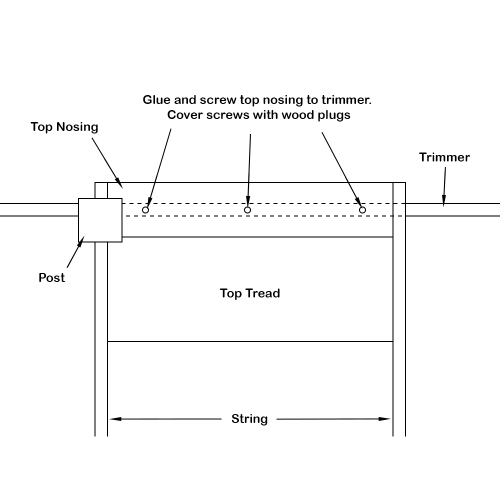
Fit the top riser and the top nosing. |
|
The width of the top nosing may have to be cut to suit. |
|
 |
|
|
Now screw/glue and wedge the top riser exactly as you did the bottom riser, but this time also screw into the back of the top tread in at least five places spacing the screws evenly. |
|
|
WE RECOMMEND: If the tread is MDF, you must use proper MDF screws and glue. |
|
 |
|
|
11. |
The staircase is now ready to be put into place. |
|
Once the top post and handrail are fitted, move the stairs so the top post is correctly notched over the trimmer and the stairs are fitted at the correct angle with the newels vertical and treads level. Use a spirit level to check this. |
|
 |
|
|
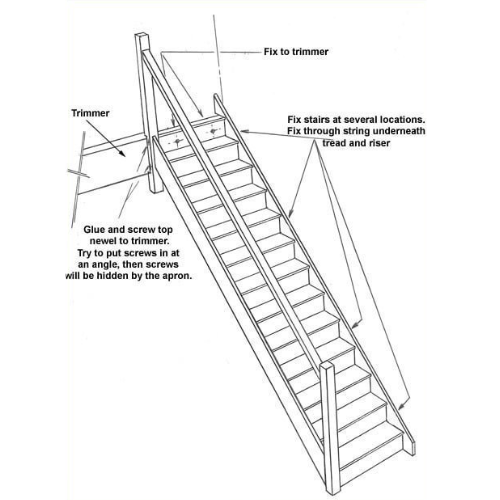
When the staircase is in the correct position fix it to the trimmer and wall in several locations using glue and screws. |
|
 |
|
 |
|
|
12. |
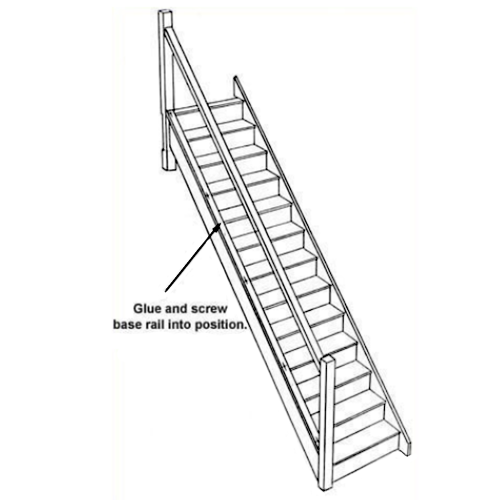
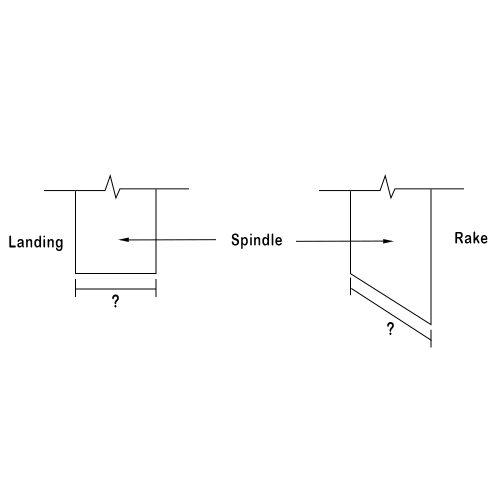
Fit base rail on the rake of stairs. |
 |
|
|
13. |
Fit return handrail apron, nosing and cover mould. (see below) |
|
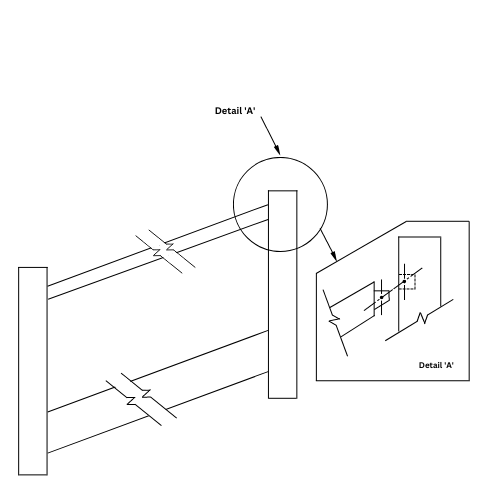
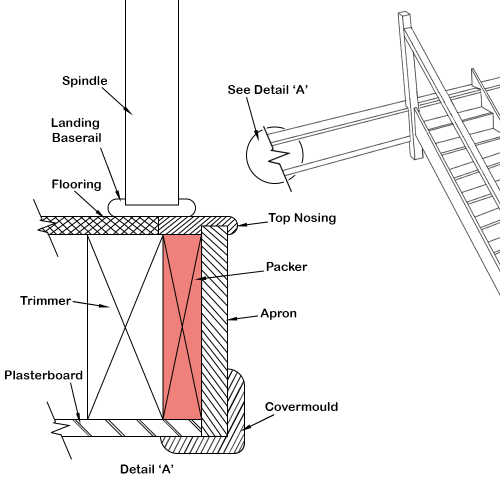
Fit apron, nosing and cover mould. To carry the landing nosing and baserail, you will need to fit a ply or timber packer to the trimmer. This will also hide the newel post fixings. (See detail A). |
|
 |
|
|
14. |
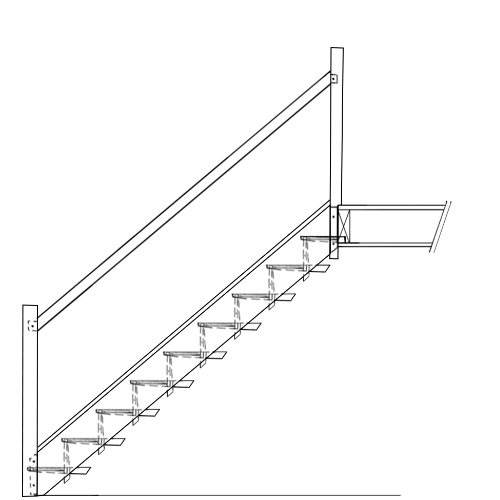
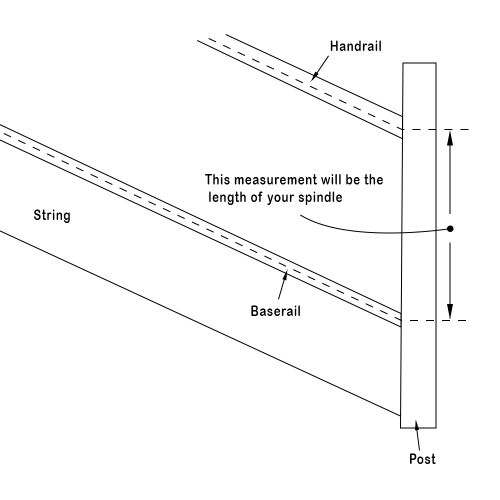
Fit spindles and infill pieces. (see below). |
 |
|
|
Cutting Spindles. (see below). NOTE: Find the angle to cut your spindles on the right-hand side of the plan that comes with the staircase or you can measure it on-site. |
|
 |
|
|
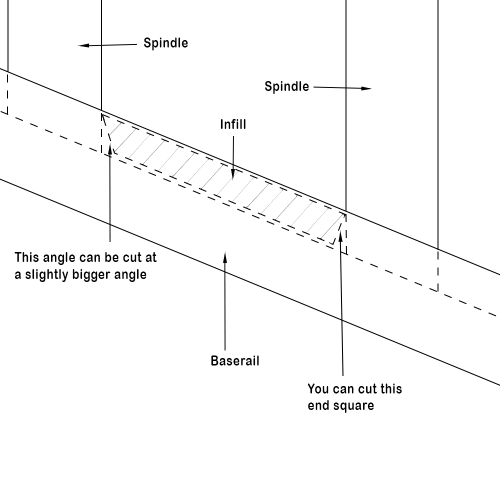
Cutting Infill |
|
|
|
|
 |
|
|
How to work out the length of your infill (spindle spacing), measure the width of the spindle. |
|
|
|
|
|
Roughly work out the number of spindles you will need. Take the total width of your spindles off the length of your handrail/baserail. Use this number and divide it by the number of spindles you have plus one. This number will be the length of your infill. EXAMPLE: Landing Balustrade - Handrail & Baserail Length = 1300 - 410 = 890 Spindles (41mm) 10 x 41 = 410 Amount of spindles 10 + 1 (11) 890 ÷ 11 = 81mm Length of infill = 81mm NOTE: The spacing between spindles must not be more than 99mm. |
|
|
15. |
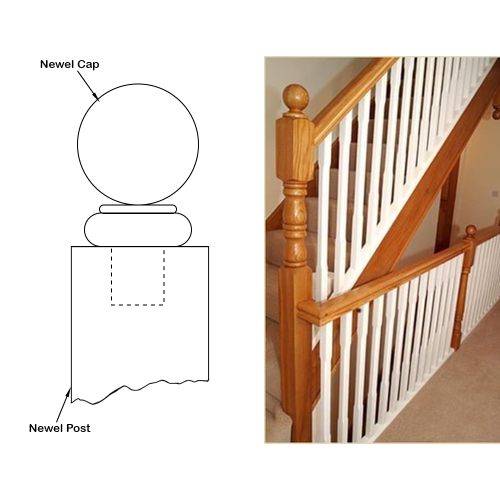
Fit newel caps and glue them on. |


|
||||||